

What you should know
Understand the mobile money considerations that affect redirect-based payment flows.
How to start
Configure API tokens and callbacks before building your checkout integration.
How is this different from the Payment Page?
Both the Payment Page and checkouts give your customers a hosted, redirect-based payment experience, so a single API call and a redirect is all you need to get paid. The difference is the level of control and tracking:
Use a checkout when you want a single reference for the whole payment — including any retries the customer makes — and control over when the checkout expires.
What does it look like
When you create a checkout you receive aredirectUrl. You forward your customer to that hosted payment page to pay you. It is optimised for mobile money:
- A user experience for your customers that is optimised for mobile money.
- Responsive design that works on desktop and mobile.
- Low code integration supporting all countries and providers.
- The fields shown adapt to how you configure the checkout (see Different ways to use a checkout).
1
Pay
The customer reviews the payment and chooses or confirms the wallet to pay from.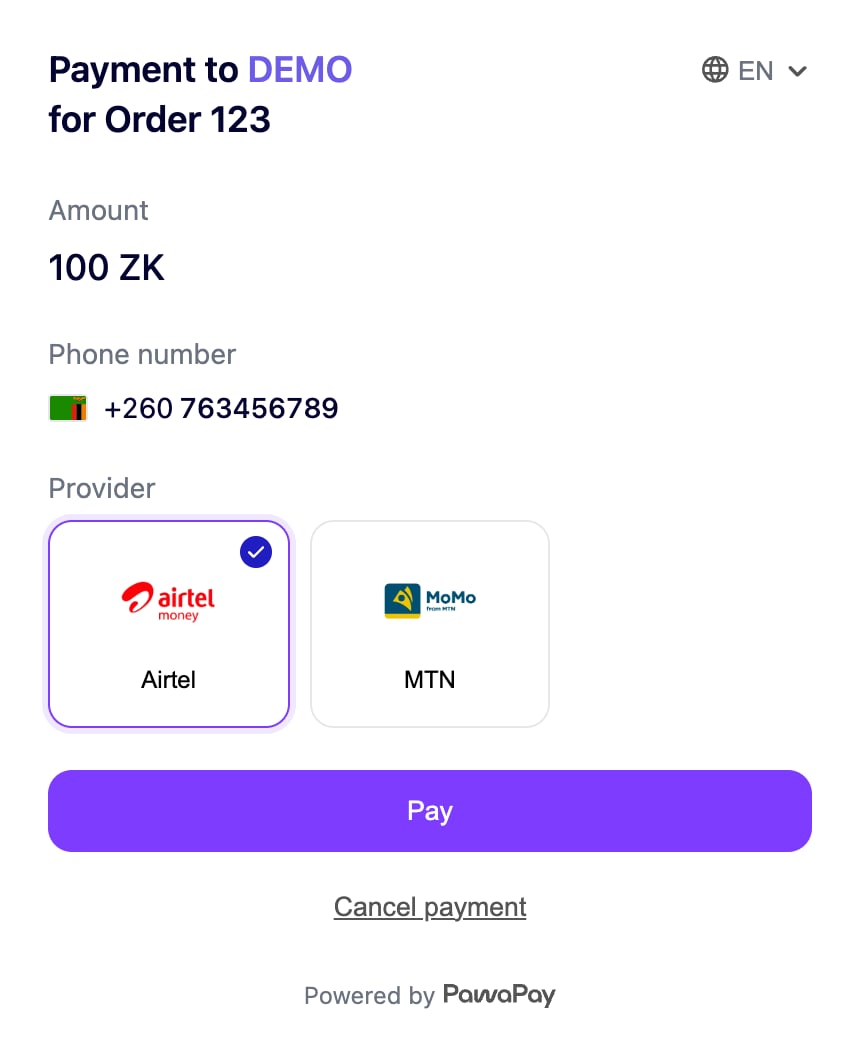
2
Authorise the payment
For most providers the customer then authorises the payment with a PIN prompt on their phone. The page shows the exact steps for the provider being used.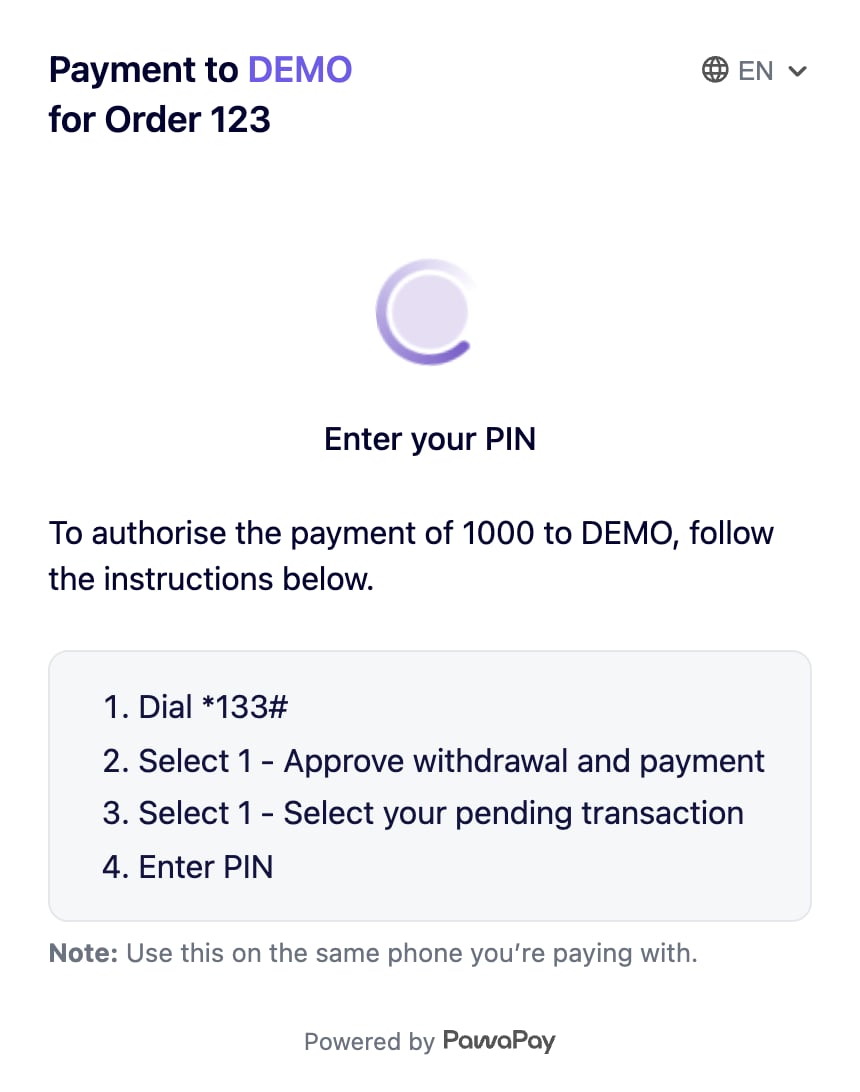
Some providers authorise automatically and skip this step. For providers that support it, if the PIN prompt expires it can be re-sent (revived), and the page shows the updated instructions — the customer does not need to start over.
3
All done
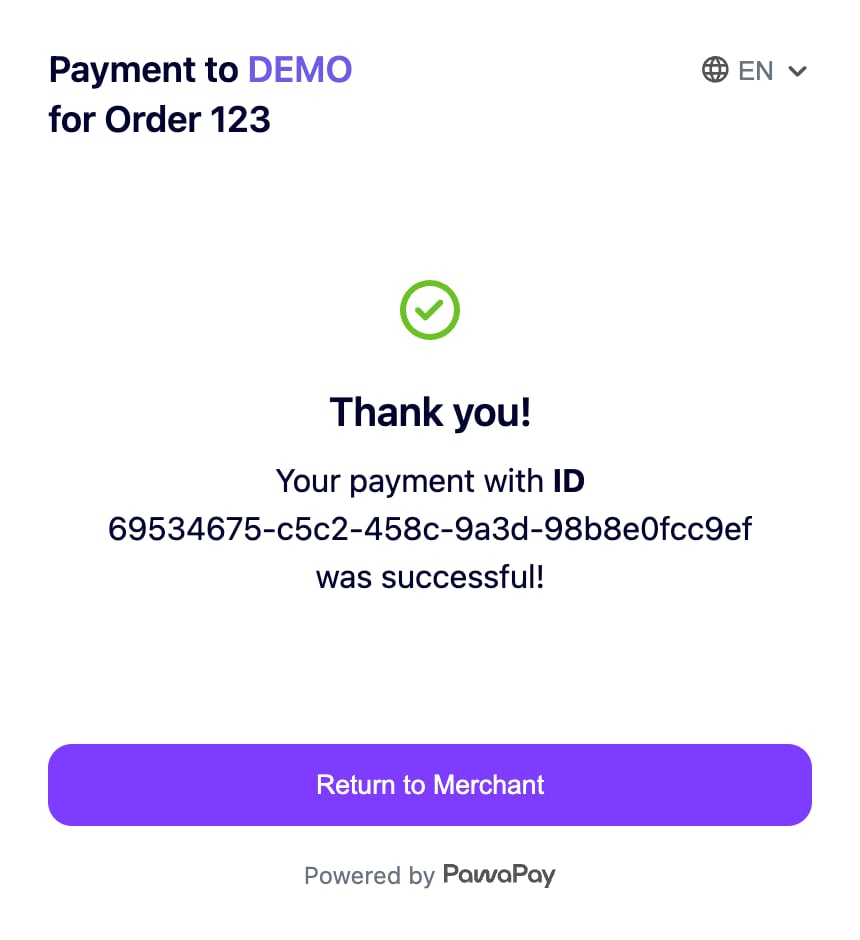
Creating and using a checkout
1
Create the checkout
Send a request to the initiate checkout endpoint.The response includes the
checkoutId must be a UUIDv4 that you generate and store before making the request.
This is so that you always have a reference to the checkout you are expecting, even if you do not receive a response from us due to network errors.
This allows you to always reconcile all payments between your system and PawaPay.The minimal valid request only requires checkoutId and returnUrl.
If you provide payer, then payer.accountDetails.allowCustomerToOverride is required.
When accepted, the response returns the redirectUrl for the hosted payment page that you forward the customer to.You will receive a response immediately.checkoutCode — a unique code for the checkout that also forms the path of the redirectUrl.
Store it alongside your checkoutId: when the customer is sent back to your returnUrl, the checkoutCode is appended as a query parameter.
It is how you find the checkout — and the checkoutId you stored for it — that the customer is returning from.You can tailor the customer experience through the optional parameters below.The customer is always sent back to your
returnUrl once the payment is finished or cancelled. The returnMethod controls how that happens:2
Redirect the customer
Redirect the customer to
redirectUrl.This hosted payment page is where the customer selects or confirms the wallet details and authorises the payment.
Once the checkout flow finishes, the customer will be redirected to the returnUrl you provided, according to the returnMethod, with the checkoutCode appended as a query parameter.3
Track the checkout status
A checkout has its own lifecycle. You can find out its status by either waiting for a callback or polling the check checkout status endpoint.When you have configured callbacks, PawaPay will
POST a checkout callback to your callback URL when the checkout reaches a final status.You can also poll the status at any time. The status response gives you the overall checkout status together with the current payment attempt and the full history of attempts.deposit contains the latest payment attempt when one exists.
depositsHistory contains the full history of attempts for the checkout. PawaPay records these for you — you normally only need the checkout status.4
Expire an unused checkout if needed
If the checkout should no longer be used, call the expire checkout endpoint.
After a checkout has expired, the customer can no longer make new payment attempts on it.
Different ways to use a checkout
The same checkout endpoint supports a range of payment experiences, controlled by what you provide foramounts, countries and payer. Pick the combination that matches your use case.
The two parameters that shape the experience the most are:
amounts— fix the amount(s) the customer can pay, or leave it out to let them enter their own.payer— pre-fill the mobile money wallet, and decide withallowCustomerToOverridewhether the customer may change it.
1
Let the customer choose everything
Use this when the customer decides how much to pay — for example topping up an eWallet, funding an account, or an open-ended donation. You don’t know the amount up front, and the customer may pay from any wallet they like.The minimal checkout only requires The customer chooses the country, enters the mobile money wallet to pay from and enters the amount.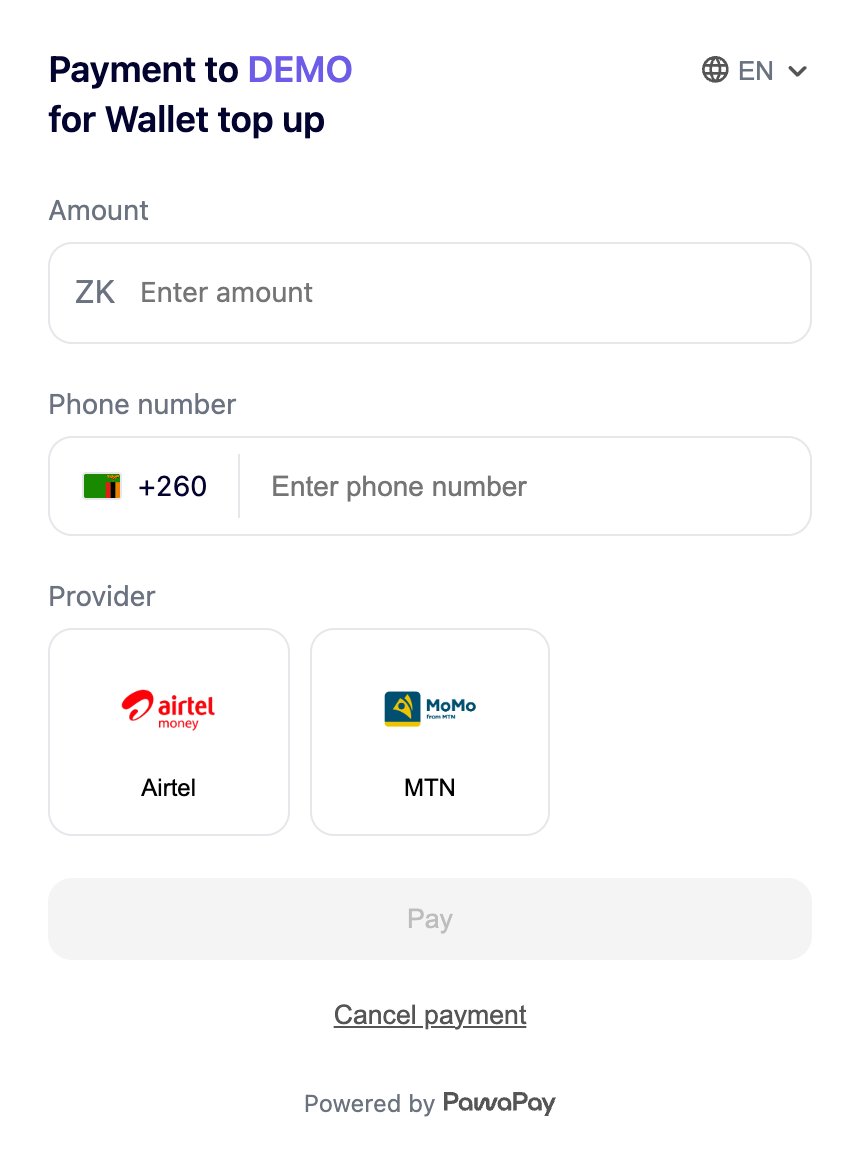
checkoutId and returnUrl.2
Fix the amount, let the customer choose the wallet
Use this when you know the price but not the wallet — the classic e-commerce order total. You set the amount and the customer simply picks which wallet to pay from. Provide a single entry in The page shows the fixed amount and only asks the customer for the wallet to pay from.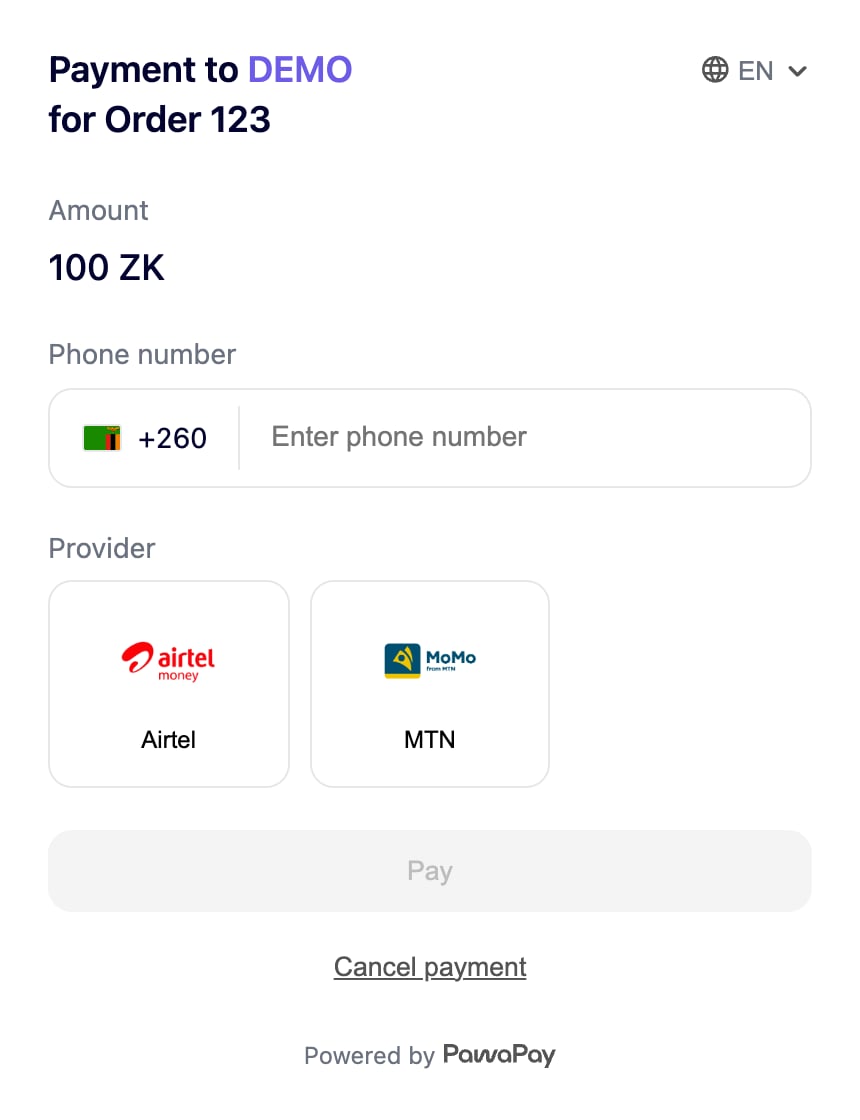
amounts and the amount is locked.Each entry in
amounts requires country, currency and amount together. The currency must be one that is supported in the specified country.If the customer can pay from more than one country, you must include an amounts entry for every country and currency combination you want to support — the page shows the entry matching the country the customer is paying from. A country can also support more than one currency: for example, in the DRC (COD) both the Congolese franc (CDF) and US dollar (USD) are supported, so to offer USD you must include a USD entry as well.3
Offer a few fixed amount options
Use this for predefined price points — tipping, donation tiers, or packages and bundles where the customer chooses from a set of amounts you define. Provide several entries in The page shows your amounts as options for the customer to choose from. The other details depend on the rest of your configuration.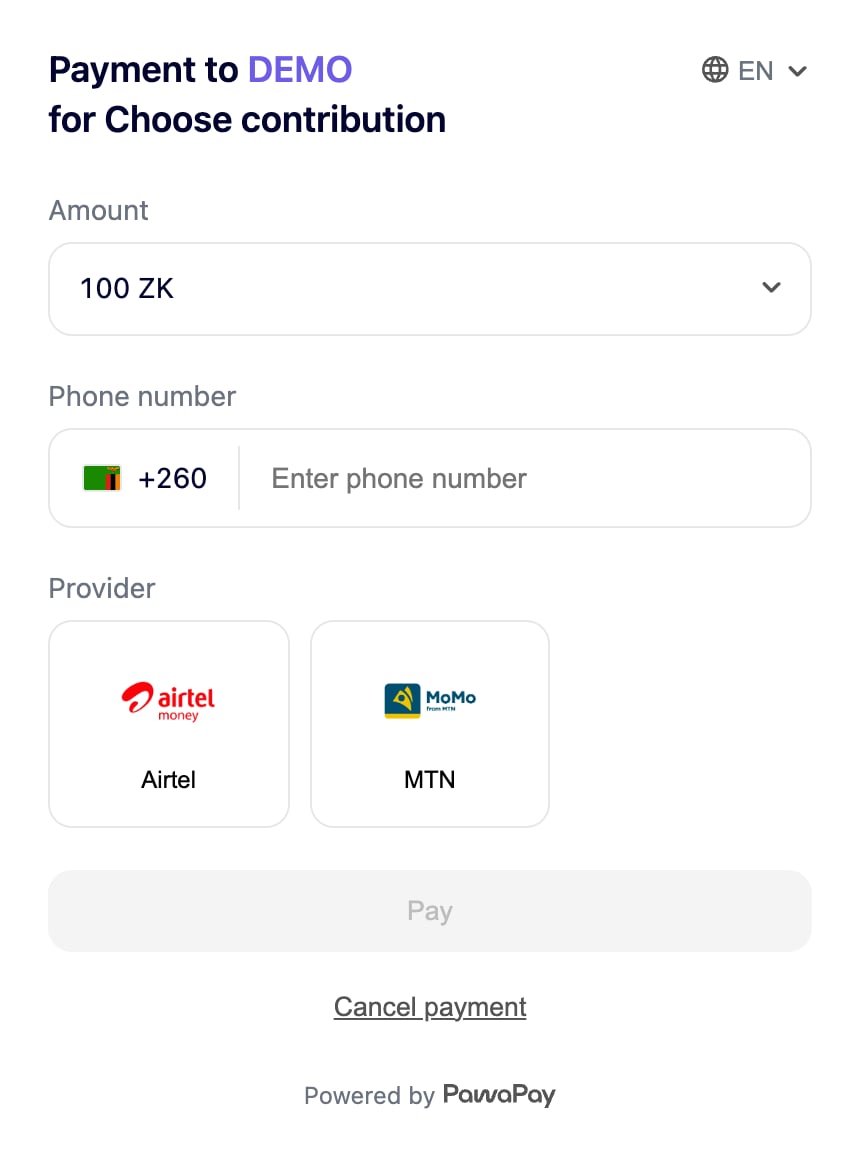
amounts.4
Restrict which countries are available
Use this when you only collect payments in specific markets — restricting the countries keeps the page focused on where you actually operate, and stops customers from selecting a country you can’t settle in. By default, the customer can pay with a mobile money wallet from any country configured on your PawaPay account; use Or offer a subset of countries and let the customer choose between them:The page only offers the countries you allow.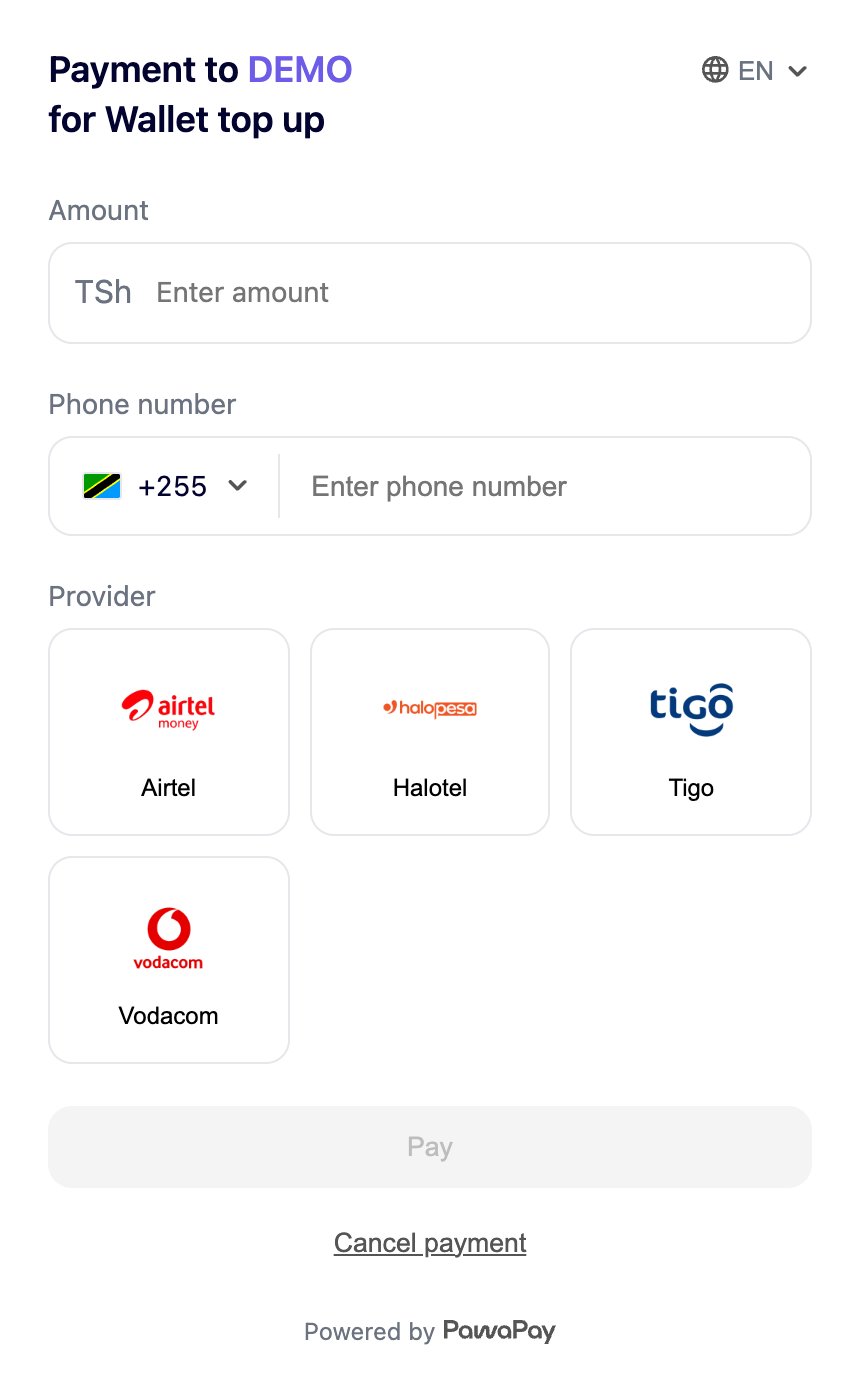
countries to narrow it.Fix a single country so the customer can only pay from there:If you fix
amounts as well, make sure the country of each amount option falls within the allowed countries. The page shows the amount option matching the country the customer is paying from.5
Pre-fill the payer, but let the customer change it
Use this for returning customers — pre-filling the wallet they used before removes a step at checkout and speeds up conversion, while The page opens with the wallet pre-filled, and the customer can still change it.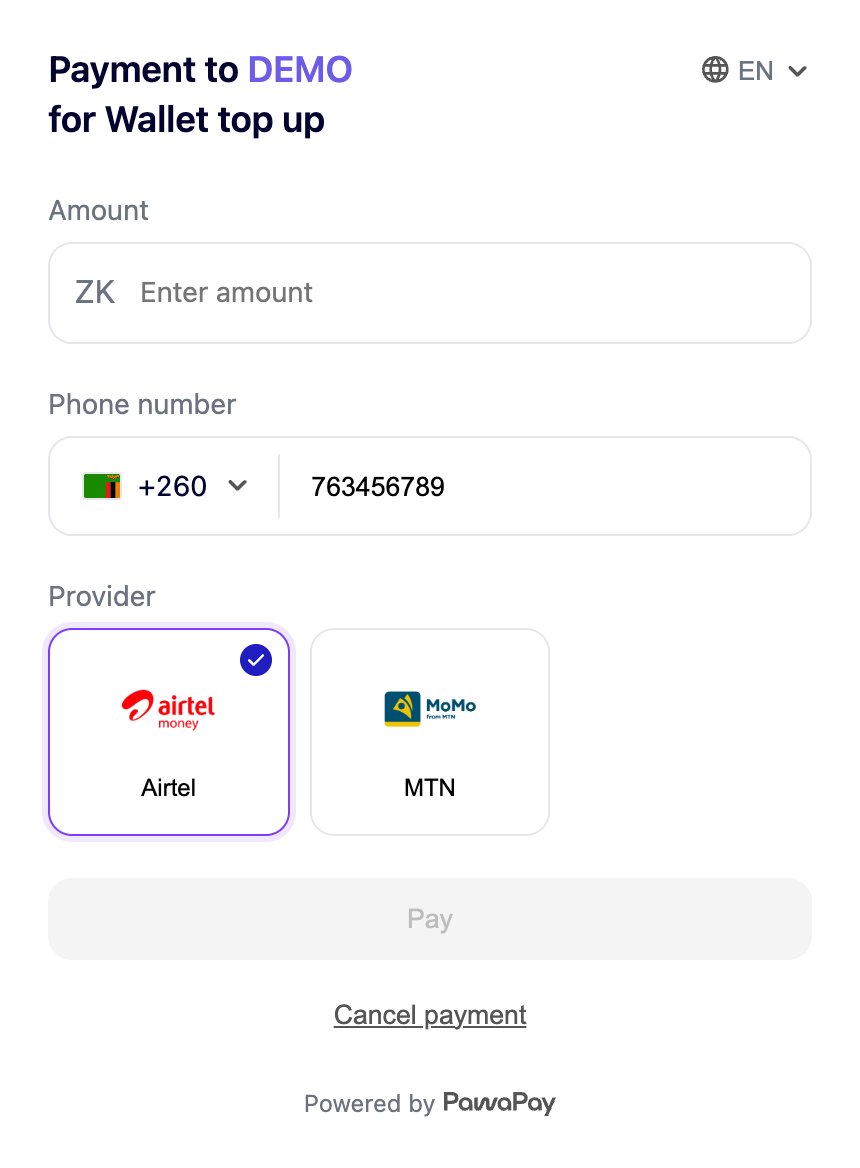
allowCustomerToOverride: true still lets them pay from a different wallet if they want. Provide payer with allowCustomerToOverride set to true.6
Fix the payer so it cannot be changed
Use this when the customer must pay from a specific wallet — for example loan repayments, payouts of winnings, or any KYC-verified flow where the paying wallet has to match the one on file. This guards against fraud and keeps you compliant. Provide The page shows the wallet as fixed and the customer cannot change it.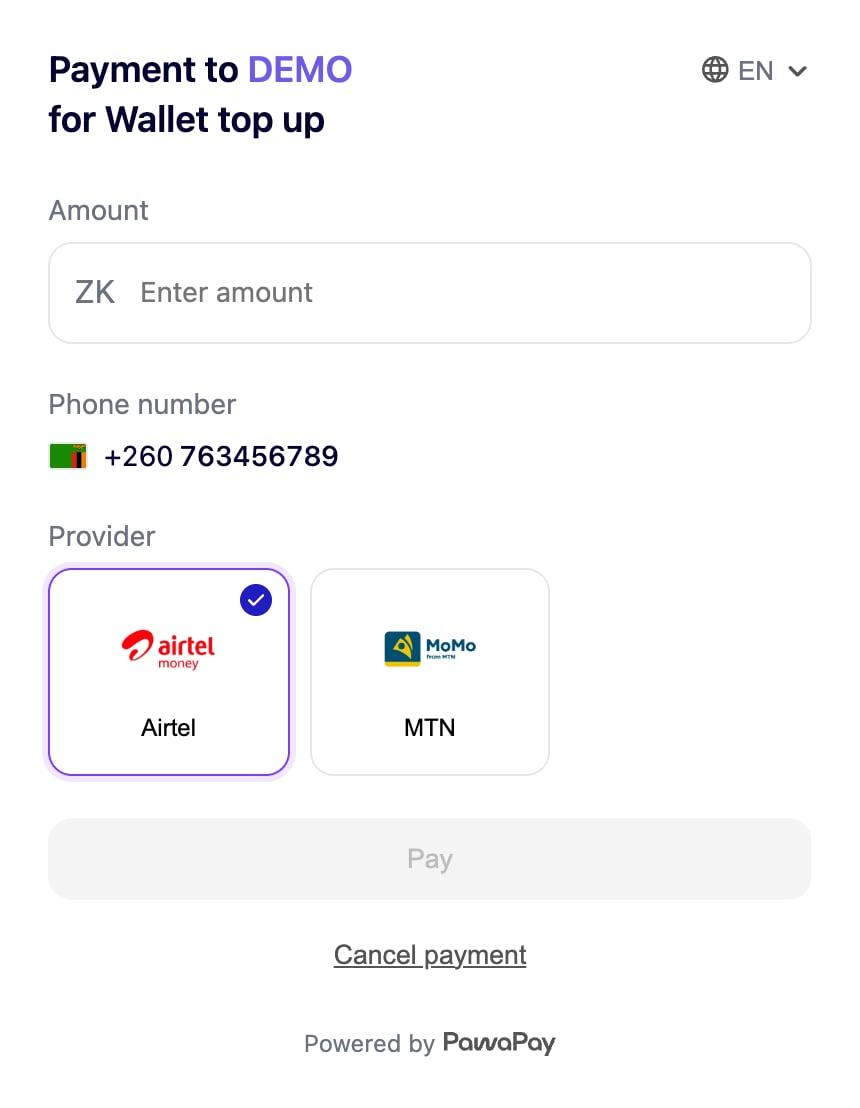
payer with allowCustomerToOverride set to false and the wallet is locked.7
Fix everything for a one-tap authorisation
Use this for the fastest possible checkout — when both the customer and the amount are known, such as a subscription renewal, an in-app purchase or a repeat order. Combining a fixed This is the most streamlined experience: the amount and wallet are both fixed, so the customer just confirms and authorises the payment.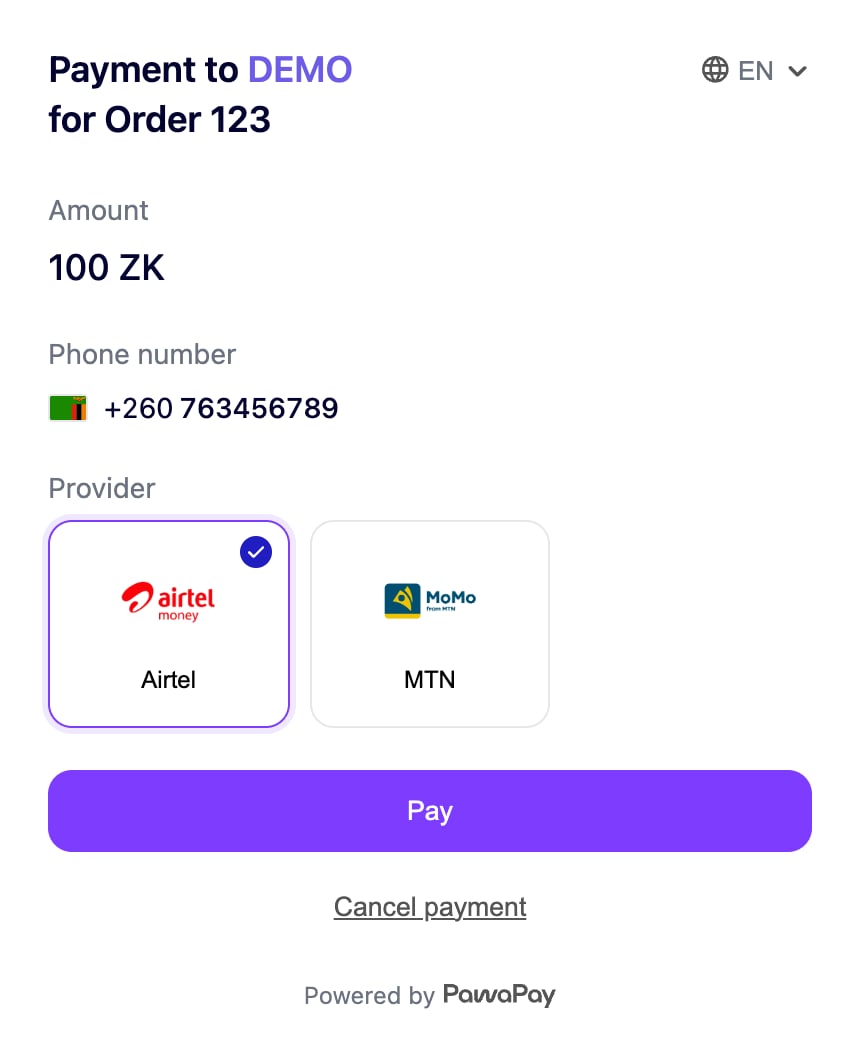
amounts entry with a fixed payer leaves the customer nothing to enter but the authorisation.The checkout lifecycle
A checkout moves through its own statuses, independently of the individual payment attempts inside it.Just like deposits, a checkout has two separate kinds of status:
- The initiation status returned in the initiate checkout response —
ACCEPTED,REJECTEDorDUPLICATE_IGNORED— tells you whether the request was accepted for processing. - The lifecycle status below — returned by check checkout status and in callbacks — tracks the checkout itself. Once accepted, a checkout enters its lifecycle at
WAITING_PAYMENT.
The aggregate
depositStatus and each entry in depositsHistory reflect the payment attempts, which follow the standard payment lifecycle (ACCEPTED, PROCESSING, COMPLETED, FAILED).
A single checkout can contain multiple payment attempts, but at most one can complete successfully.
When a customer retries a failed attempt on the hosted payment page, the new attempt is added to
depositsHistory automatically — you don’t need to create or manage anything.Cancellation and returning to your site
The customer is sent back to yourreturnUrl with the checkoutCode appended as a query parameter:
checkoutCode to look up the checkout — and the checkoutId you stored for it — in your system, so you know which checkout the customer is returning from.
The customer is returned in these cases:
- The payment succeeds — the customer is returned automatically, following the
returnMethodyou set: immediately (INSTANT), after a short countdown (COUNTDOWN), or when they press Return to merchant (CUSTOMER_ACTION). - The customer cancels — they can press Cancel payment on the hosted payment page. They are asked to confirm (“Yes, cancel” / “No, stay”), and once they confirm they are redirected back to your
returnUrl. The checkout status becomesCANCELLED.
How to find out the result
1
Waiting for a callback or polling
When the checkout reaches a final status, you will receive a checkout callback with the final state of the checkout, including the latest payment attempt and the full history of attempts.If you have not configured callbacks, you can poll the check checkout status endpoint.On your
returnUrl, use the checkoutCode query parameter to find the corresponding checkoutId in your system, then validate the final status by either confirming the callback has been received or using the check checkout status endpoint.2
And done!
We now know what happened to the payment and can make sure it’s reflected accurately.Let’s now take a look at how to handle failed payments.
Handling processing failures
If an attempt’sstatus is FAILED, you can find further information about the failure from its failureReason.
It includes the failureCode and the failureMessage indicating what has gone wrong.
Checkout payments use the same failure codes as standard deposits.
Find all the failure codes and implement handling as you choose.
Because the customer can make multiple attempts within a checkout, a failed attempt does not necessarily mean the checkout has failed — they can simply retry within the same checkout, with no action needed from you. Treat the checkout as failed only when its own status is FAILED, EXPIRED or CANCELLED.
Ensuring consistency
When working with financial APIs there are some considerations to take to ensure that you never think a payment is failed, when it is actually successful or vice versa. It is essential to keep systems in sync on the statuses of payments. Let’s take a look at some considerations and pseudocode to ensure consistency.1
Defensive status handling
All statuses should be checked defensively without assumptions.
2
Handling network errors and system crashes
The key reason we require you to provide a The important thing to notice here is that we only mark a payment as FAILED when there is a clear indication of its failure.
We use the check checkout status endpoint when in doubt whether the checkout was
checkoutId for each checkout is to ensure that you can always ask us what the status of a checkout is, even if you never get a response from us.You should always store this checkoutId in your system before initiating a checkout.
Once the checkout has been accepted, you should also store the checkoutCode from the response — it is appended to your returnUrl as a query parameter and is how you find the right checkout when the customer is redirected back to your site.ACCEPTED by PawaPay.3
Implementing an automated reconciliation cycle
Implementing the considerations listed above avoids almost all discrepancies of payment statuses between your system and PawaPay.
When using callbacks to receive the final statuses of payments, issues like network connectivity, system downtime, and configuration errors might cause the callback not to be received by your system.
To avoid keeping your customers waiting, we strongly recommend implementing a status recheck cycle.This might look something like the following.Having followed the rest of the guide, with this simple reconciliation cycle, you should not have any inconsistencies between your system and PawaPay.
Having these checks automated will take a load off your operations and support teams as well.
Payments in reconciliation
When using PawaPay all payments are reconciled by default and automatically — we validate every final status to ensure there are no discrepancies. Sometimes the final status of a payment attempt cannot be determined immediately and the attempt is sent to our automatic reconciliation engine. While this happens, the payment attempt — and the checkout — simply remain inPROCESSING; the Checkout API does not surface a separate reconciliation status.
You do not need to take any action — the final status will be determined soon.
The reconciliation time varies by provider. Payments that turn out to be successful are reconciled faster.
What to do next?
We’ve made everything easy to test in our sandbox environment before going live.Test different failure scenarios
We have different phone numbers that you can use to test various failure scenarios on your sandbox account.
Review failure codes
Make sure all the failure codes are handled.
Add another layer of security
To ensure your funds are safe even if your API token should leak, you can always implement signatures for financial calls to add another layer of security.
And when you are ready to go live
Have a look at what to consider to make sure everything goes well.