What you should know
How to start
Initiating a deposit
Let’s start by hard-coding everything. Throughout this guide we will be making the flow more dynamic and improving the customer experience incrementally.Initiate the deposit
depositId to uniquely identify this deposit.
This is so that you always have a reference to the deposit you are initiating, even if you do not receive a response from us due to network errors.
This allows you to always reconcile all payments between your system and pawaPay.
You should store this depositId in your system before initiating the deposit with pawaPay.The amount and currency should be relatively self-explanatory.
This is the amount that will be collected from the customer.
Any fees will be deducted from that amount after the collection has completed.Then the provider and phoneNumber specify exactly who is paying.
Mobile money wallets are identified by the phone number, like bank accounts are by their account number.
The provider specifies which mobile money operator this wallet is registered at. For example MTN Ghana or MPesa Kenya.You will receive a response for the initiation.status shows whether this deposit was ACCEPTED for processing or not.
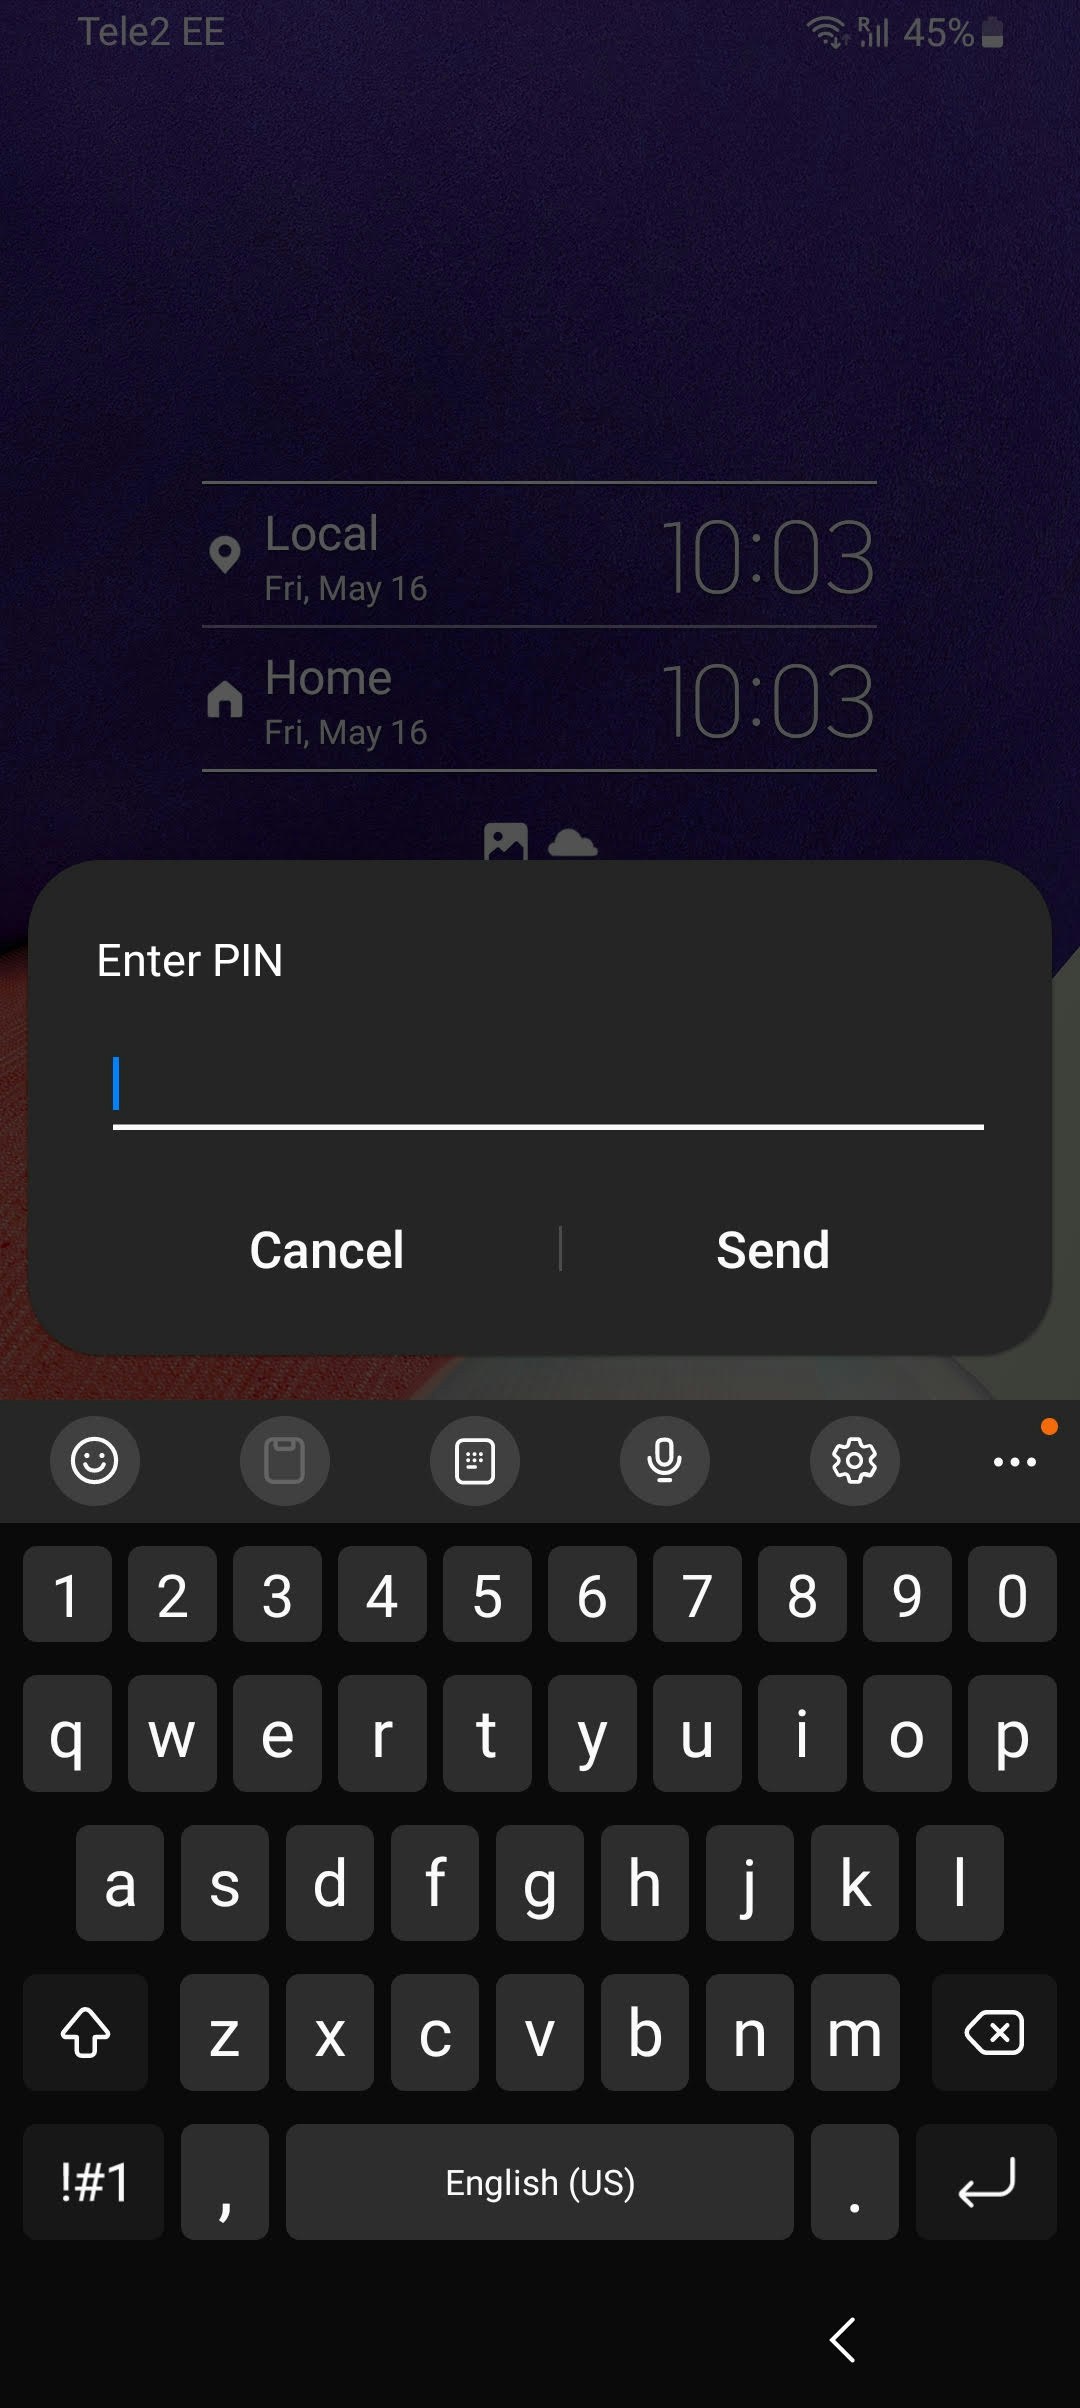
We will go through failure modes later in the guide.We will also take a look later how nextStep can be used, but for now it’s safe to ignore it.The customer will approve the payment
Get the final status of the payment
status which is COMPLETED indicating that the deposit has been processed successfully and the funds have been collected to your wallet on your pawaPay account.And done!
- How to make this easy to expand to new markets and providers
- How to handle failures so that discrepancies between your system and pawaPay don’t happen
- How to cover countries with providers that use different authorisations methods for payments
- And more…
Asking for payment details from the customer
In the first part we harcoded everything. Now let’s take a look at how to ask that information from the customer who is paying. We are focusing on the use case where you know the amount to be paid already. Later in the guide, we will also cover the case where the customer can choose the amount to pay.Showing the providers
providers we have a list of all the providers that have been configured on your account for initiating deposits.
The displayName contains the name of the provider.
You can show those as options to your customer.To enable new payment providers being automatically added to your deposit flows, we’ve also added the logo of the provider as the logo.
This way it is possible to implement the deposit flow dynamically, so that when new providers are enabled on your pawaPay account, they become available for your customers without additional effort.This might look something like this:
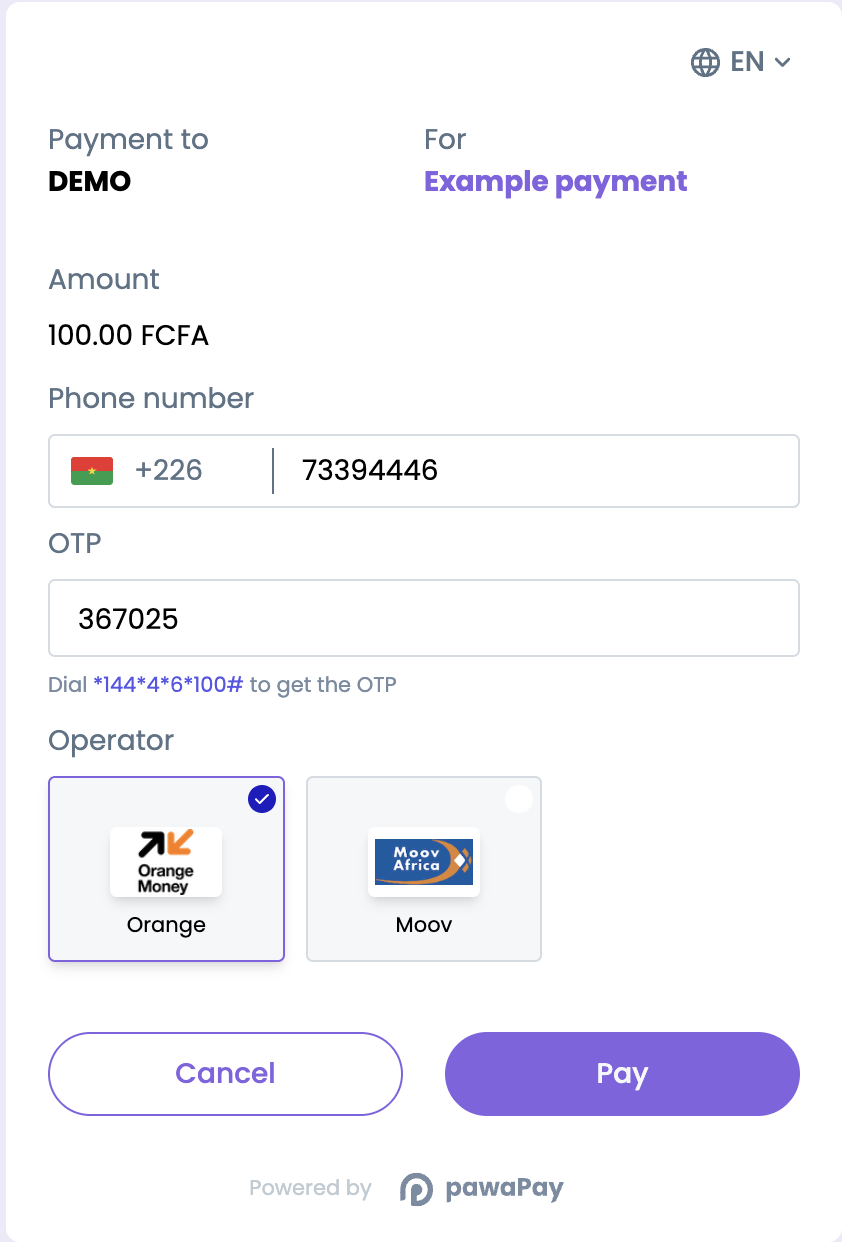
Ask for the phone number
prefix within the country object.
This the country calling code for that country.
We recommend showing that to the customer in front of the input box for entering the phone number.
This makes it clear that the number they enter should not include the country code.We have also added flag to the country object to make it look a little nicer.This might look something like this: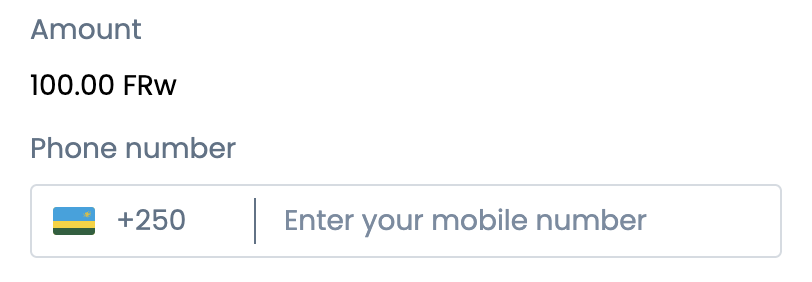
Now let's validate the number and predict the provider
prefix to what was entered by the customer as the phone number.You can now send it to validation. We will handle basic things like whitespace, characters etc.
We also make sure the number of digits is correct for the country and handle leading zeros.phoneNumber is the sanitized MSISDN format of the phone number that you can use to initiate the deposit.
We strongly recommend using this endpoint for validating numbers especially due to some countries not strictly following ITU E.164.Also, in the response, you will find the provider. This is the predicted provider for this phoneNumber.
We recommend preselecting the predicted provider for the customer.
In most countries we see very high accuracy for predictions removing another step from the payment experience.We recommend allowing the customer to override the prediction as the accuracy is not 100%.You should now have a payment page similar to this: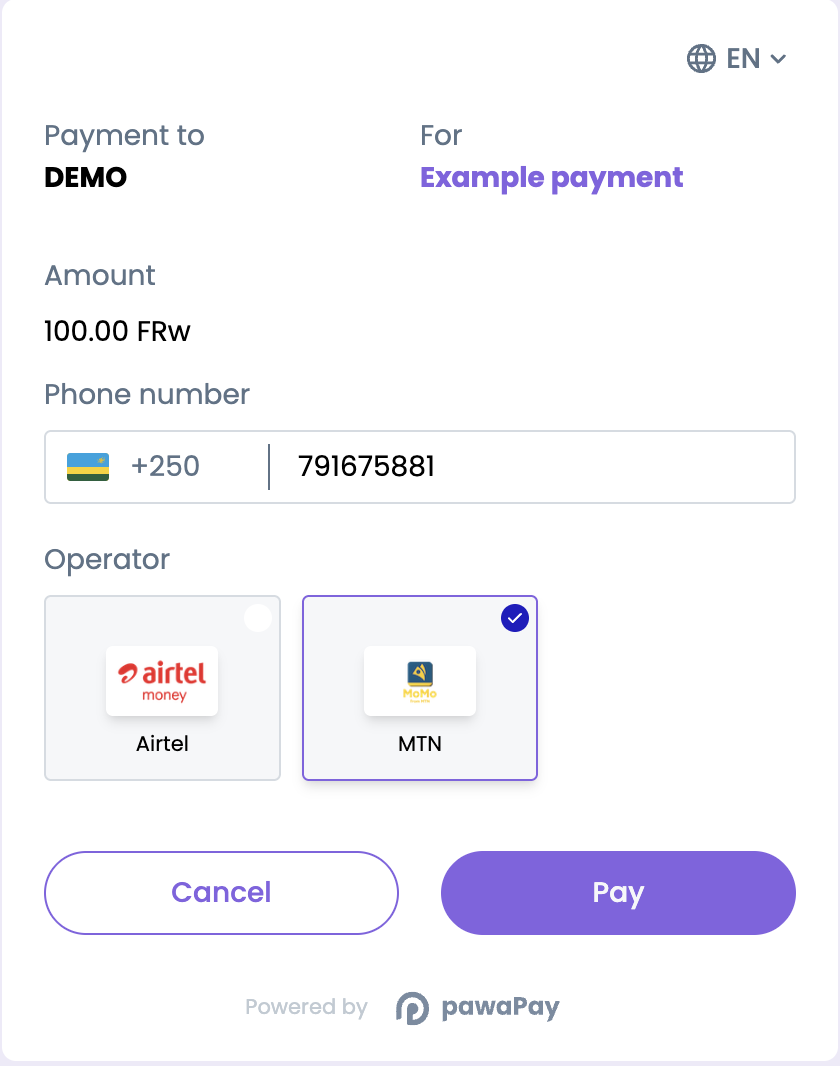
Initiate the deposit
Done again!
After initiating the deposit
After you initiate a deposit, the customer will need to authorise it. While there are a couple of different ways providers handle payment authorisation, the most common one involves a PIN prompt popping up on the customers phone. In this step, we will focus on that type of authorisation flow. Later in the guide, we will cover the rest as well.Finding the payment authorisation type
authType shows the type of authorisation that this provider uses. We are focusing on PROVIDER_AUTH currently.
Other authTypes will be covered later in the guide.The pinPrompt property is only applicable for providers with authType of PROVIDER_AUTH.
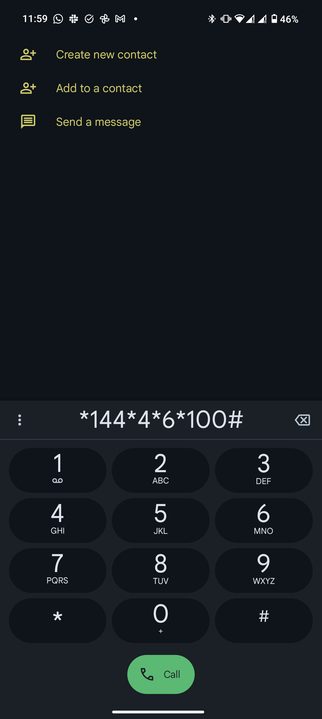
It indicates whether or not the PIN prompt that is part of the authorisation will pop up on the customers phone automatically (AUTOMATIC) or if they need to take some action for that (MANUAL).The pinPromptRevivable shows whether it’s possible for the customer to get the PIN prompt to pop up again in case it fails on the first attempt.Now that we know the specifics of the authorisation flow of the provider, let’s implement the screen to show the customer after having initiated the deposit.Customer experience for AUTOMATIC `pinPrompt`
pinPrompt value of AUTOMATIC we can show the customer a screen indicating that they should authorise the payment by entering their mobile money PIN on their phone.On the PIN prompt, there is usually a reference to the payment provider (pawaPay or one of its local subsidiaries).
You should show that to the customer as part of the message to assure that it’s a valid payment authorisation request.
You can find it from the response as nameDisplayedToCustomer.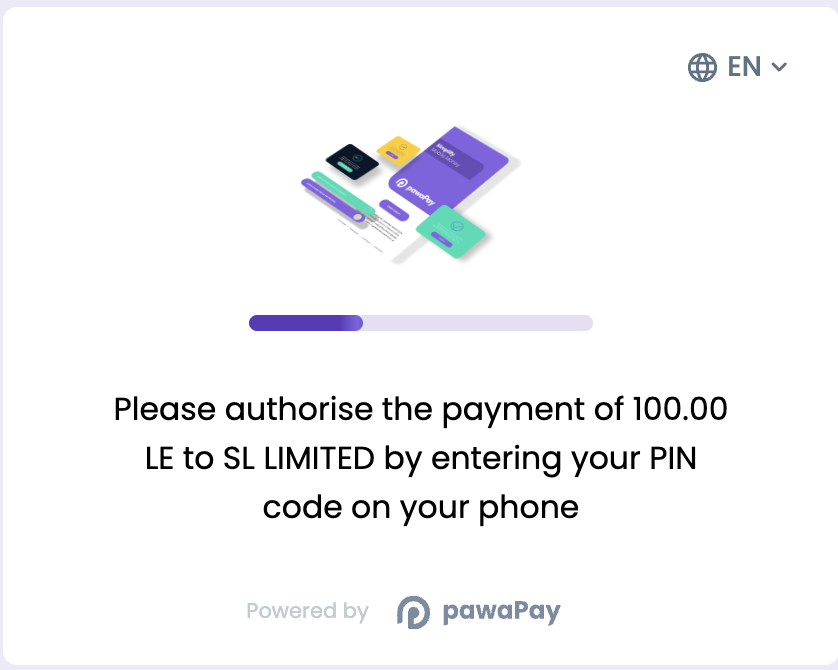
What if the PIN prompt is revivable?
pinPromptRevivable is true for the provider, it means that the customer can revive the PIN prompt in case something happens on the first attempt.
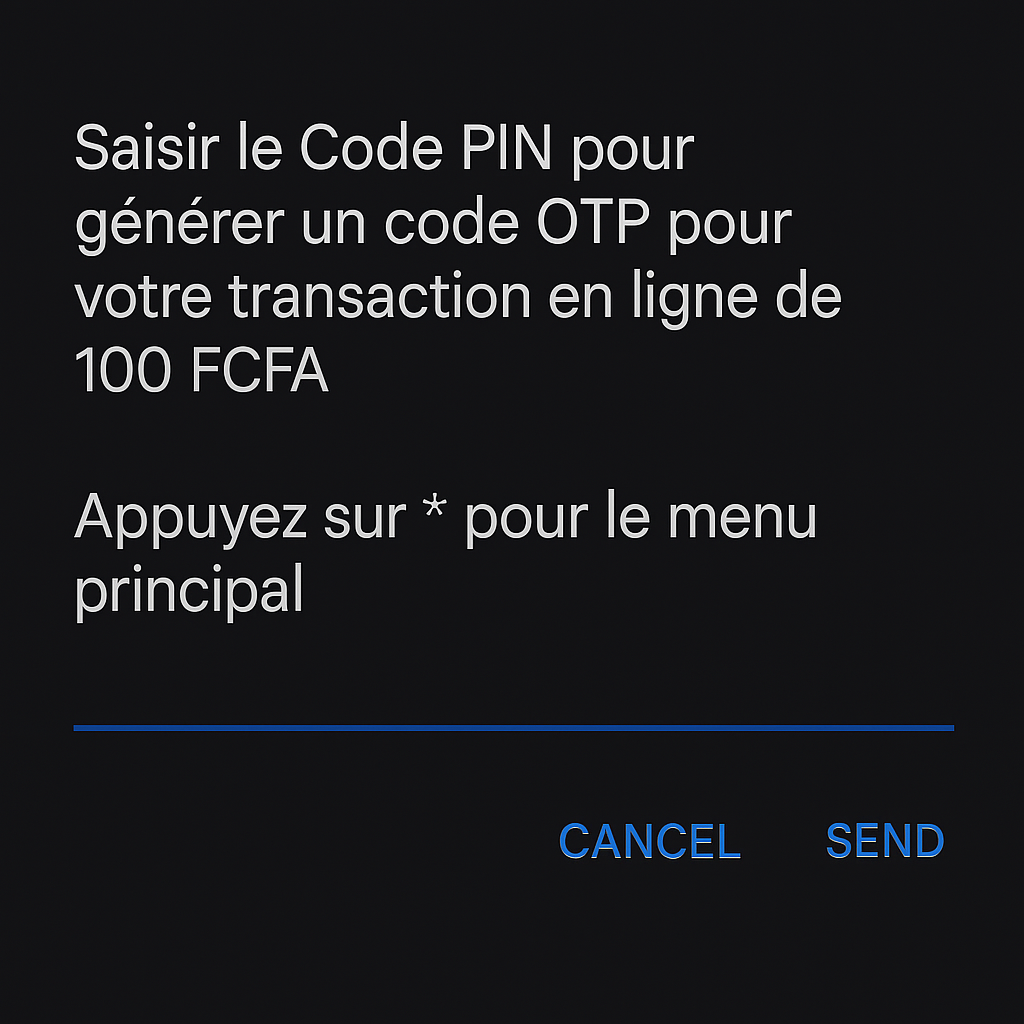
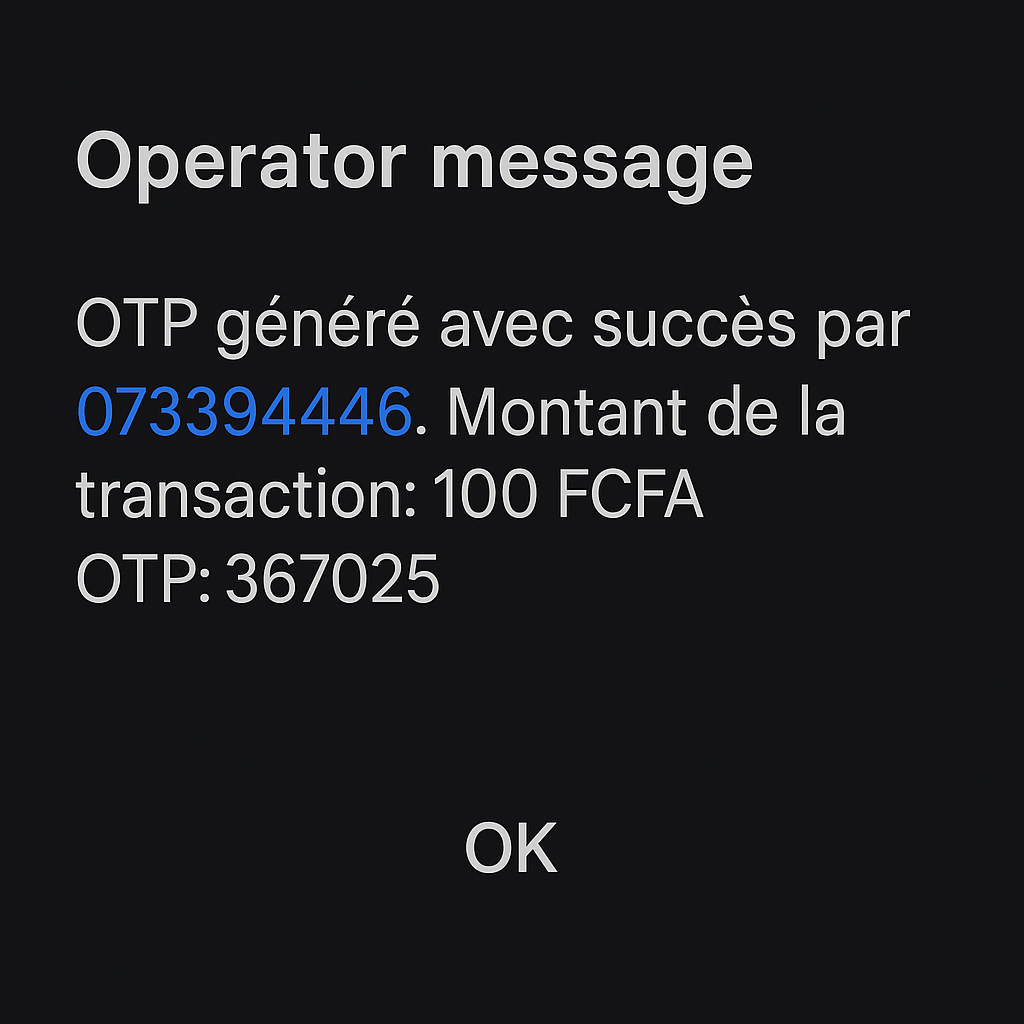
For example, this might happen when they can’t find their phone before the PIN prompt times out, they happen to get a call at the same time or there is a network issue delivering the PIN prompt.In this case, we recommend waiting about 10-15 seconds after initiation and showing the customer instructions on how they can revive the PIN prompt to try again.
The specific instructions are in the response from active configuration endpoint as ‘pinPromptInstructions’.channel for reviving the PIN prompt indicates where the customer is able to revive the PIN prompt.
This is predominantly USSD indicating they need to dial a USSD code on their phone to revive the PIN prompt.The displayName includes a message on the intent of the instructions. You are free to use it or come up with your own message.The quickLink (if available) includes the href that you can use to predial the USSD shortcode.
You should use it as the href of an <a /> tag or button.This way, when the customer is using the same phone to visit your site that they are paying with, they can press to predial the USSD code.The
instructions include the exact steps they should take to revive the PIN.
You can iterate over them to show the instructions for reviving the PIN prompt.
You can use the text of each instruction directly or if you want to emphasise key properties, you can use the template and variables.
Just surrond the variables of an instruction with the emphasis you need and replace them in the template.Customer experience for MANUAL `pinPrompt`
pinPrompt value of MANUAL, the customer needs to take some action to get to the PIN prompt.
While most customers know what to do and they will get an SMS with instructions anyway, we’ve seen improved success rates with clear instructions as part of payment experience.You can get the instructions to show for this exactly the same way as for PIN prompt revival.Avoiding failures on initiation
Payment initiation can fail for various reasons. Let’s see how we can best handle those.Handling provider downtime
status of the specific provider is OPERATIONAL or CLOSED you can inform the customer up front that this provider is currently not available and they can attempt again later.Handling decimals in amount and transaction limits
status in the response is ACCEPTED.If the status is REJECTED the failureReason will contain both the failureCode and failureMessage indicating what has happened.
Most of those failures are avoidable if handled beforehand.currencies.You can access both the decimal places supported and transaction limits from the active configuration endpoint.Ensure the right phone number format
phoneNumber in the MSISDN format.You can use the predict provider endpoint to clean up the input you receive from the customer.
Make sure the input starts with the country code.phoneNumber in the response will be in the correct format to initiate the deposit.One initiation per depositId
depositId.
When you attempt to use the same depositId more than once the payment will be rejected.Handling provider availability
Handling HTTP 500 with failureCode UNKNOWN_ERROR
UNKNOWN_ERROR failureCode indicates that something unexpected has gone wrong when processing the payment.
There is no status in the response in this case.It is not safe to assume the initiation has failed for this deposit.
You should verify the status of the deposit using the check deposit status endpoint.
Only if the deposit is NOT_FOUND should it be considered FAILED.We will take a look later in the guide, how to ensure consistency of payment statuses between your system and pawaPay.Handling processing failures
Handling failures during processing
status of the deposit is FAILED you can find further information about the failure from failureReason.
It includes the failureCode and the failureMessage indicating what has gone wrong.Find all the failure codes and implement handling as you choose.Operation specific processing failures are also documented in the API reference:We recommend allowing easy retries for customers by taking the customer back to the payment information collection screen and showing the failure reason on that page.
This way they can quickly try again.Ensuring consistency
When working with financial APIs there are some considerations to take to ensure that you never think a payment is failed, when it is actually successful or vice versa. It is essential to keep systems in sync on the statuses of payments. Let’s take a look at some considerations and pseudocode to ensure consistency.Handling network errors and system crashes
depositId for each payment is to ensure that you can always ask us what is the status of a payment, even if you never get a response from us.You should always store this depositId in your system before initiating a deposit.ACCEPTED by pawaPay.Implementing an automated reconciliation cycle
Other payment authorisation flows
Overwhelmingly providers use a PIN prompt to authorise payments. There are some markets that need support for alternative authorisation flows:- Burkina Faso
- Ivory Coast
- Senegal
Preauthorised flows
Let's add support for preauthorised payments
preAuthorisationCode into the request to initiate deposit.Redirection based flows
Some providers use redirection based authorisation. This is slightly more involved as you will need to redirect the customer to a URL where they can authorise the payment. This is used by Wave in both Senegal and Ivory Coast. Let’s look at how that might look like for a customer using Wave in Senegal.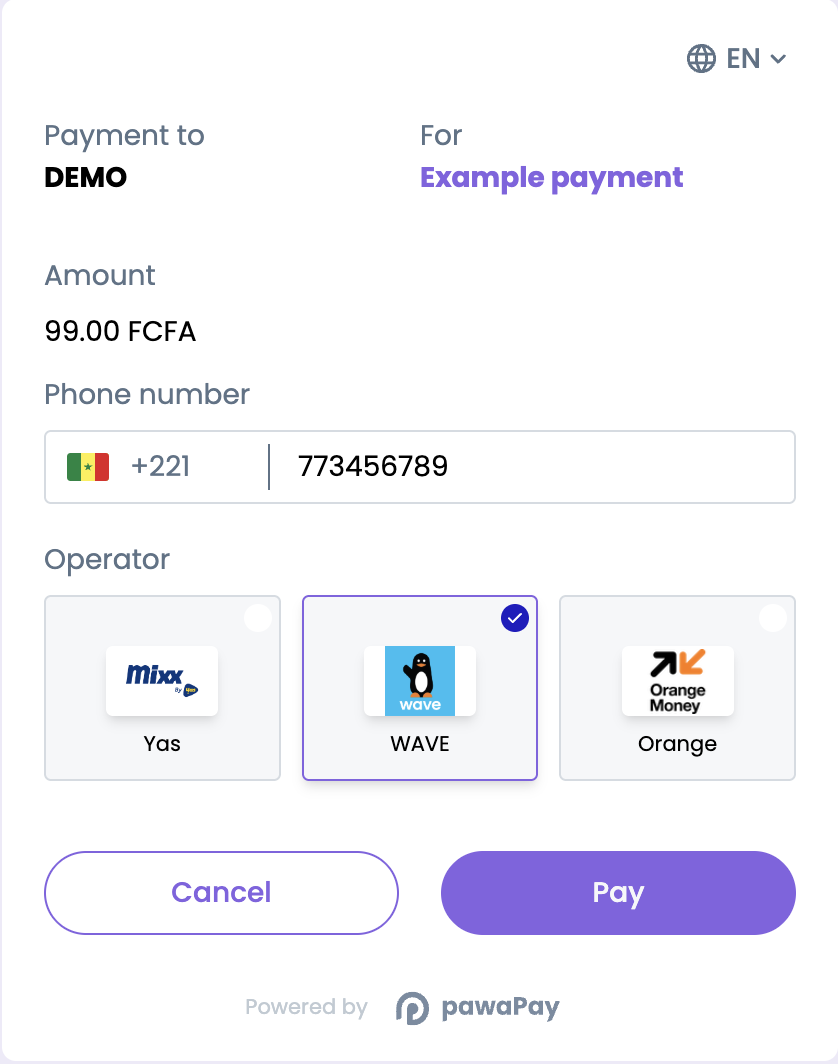
Initiate deposit
successfulUrlif the payment completed successfully.failedUrlif the payment failed to complete.
nextStep property indicates that the next thing to do is to retrieve the authorizationUrl to forward the customer to.Get the authorizationUrl
authorizationUrl.GET_AUTH_URL as the value of nextStep until the provider makes the authorizationUrl available.
Then the response will include the authorizationUrl and the value of nextStep will have changed to REDIRECT_TO_AUTH_URL.Forward the customer to authorise the payment
authorizationUrl that you retrieved in the previous step to forward the customer to it.
If they are on desktop, they will see a QR code that they can scan with their phone that has the Wave app installed.
The customer can then authorise the payment

Once that's done...
successfulUrl or failedUrl.
Confirm the payment status
successfulUrl or failedUrl from the check deposit status endpoint.Customer chooses the amount
For some use cases, the customer should decide how much they are paying. Let’s take a look at how to support that.Decimals support
NONE and TWO_PLACES. It’s easy to provide dynamic validation now that is appropriate for the provider.Transaction limits
minAmount and maxAmount.Payments in reconciliation
When using pawaPay, you might find that a payment status isIN_RECONCILIATION.
This means that there was a problem determining the correct final status of a payment.
When using pawaPay all payments are reconciled by default and automatically - we validate all final statuses to ensure there are no discrepancies.
When encountering payments that are IN_RECONCILIATION you do not need to take any action.
The payment has already been sent to our automatic reconciliation engine and it’s final status will be determined soon.
The reconciliation time varies by provider. Payments that turn out to be successful are reconciled faster.